I have had several customers the last week asking how to fix the PrintNightmare and patch it when using Intune and Windows Update for Business. So this is just a short and quick HOWTO on using expedite updates feature in Intune.
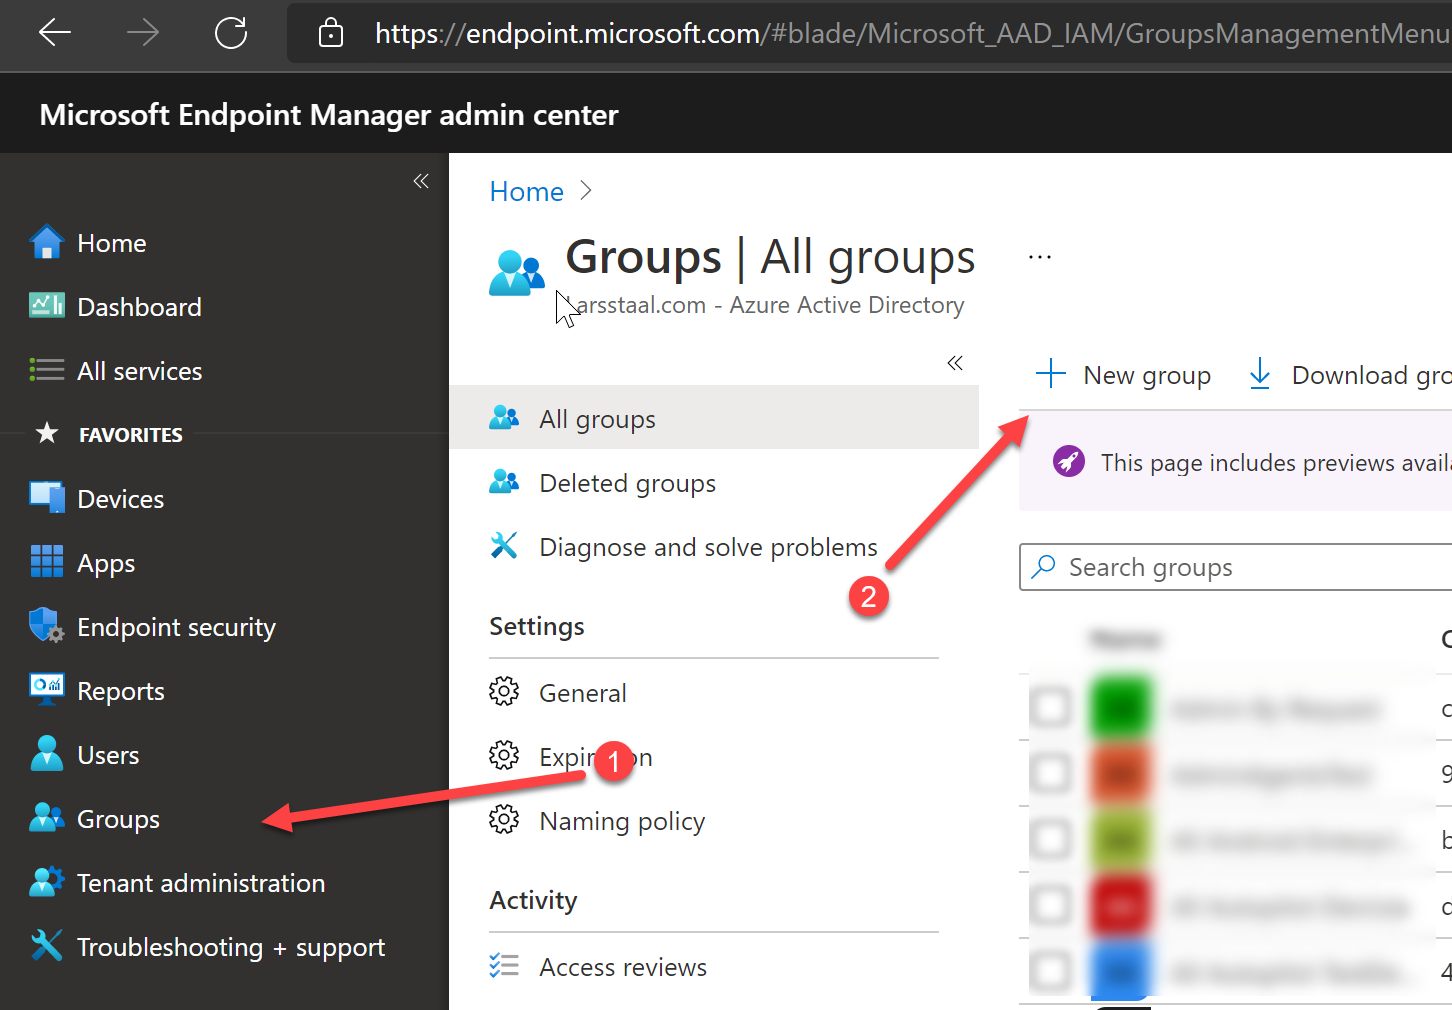
First create a group with all Windows 10 devices
Go to Microsoft Endpoint Manager portal: https://endpoint.microsoft.com and go to Groups.
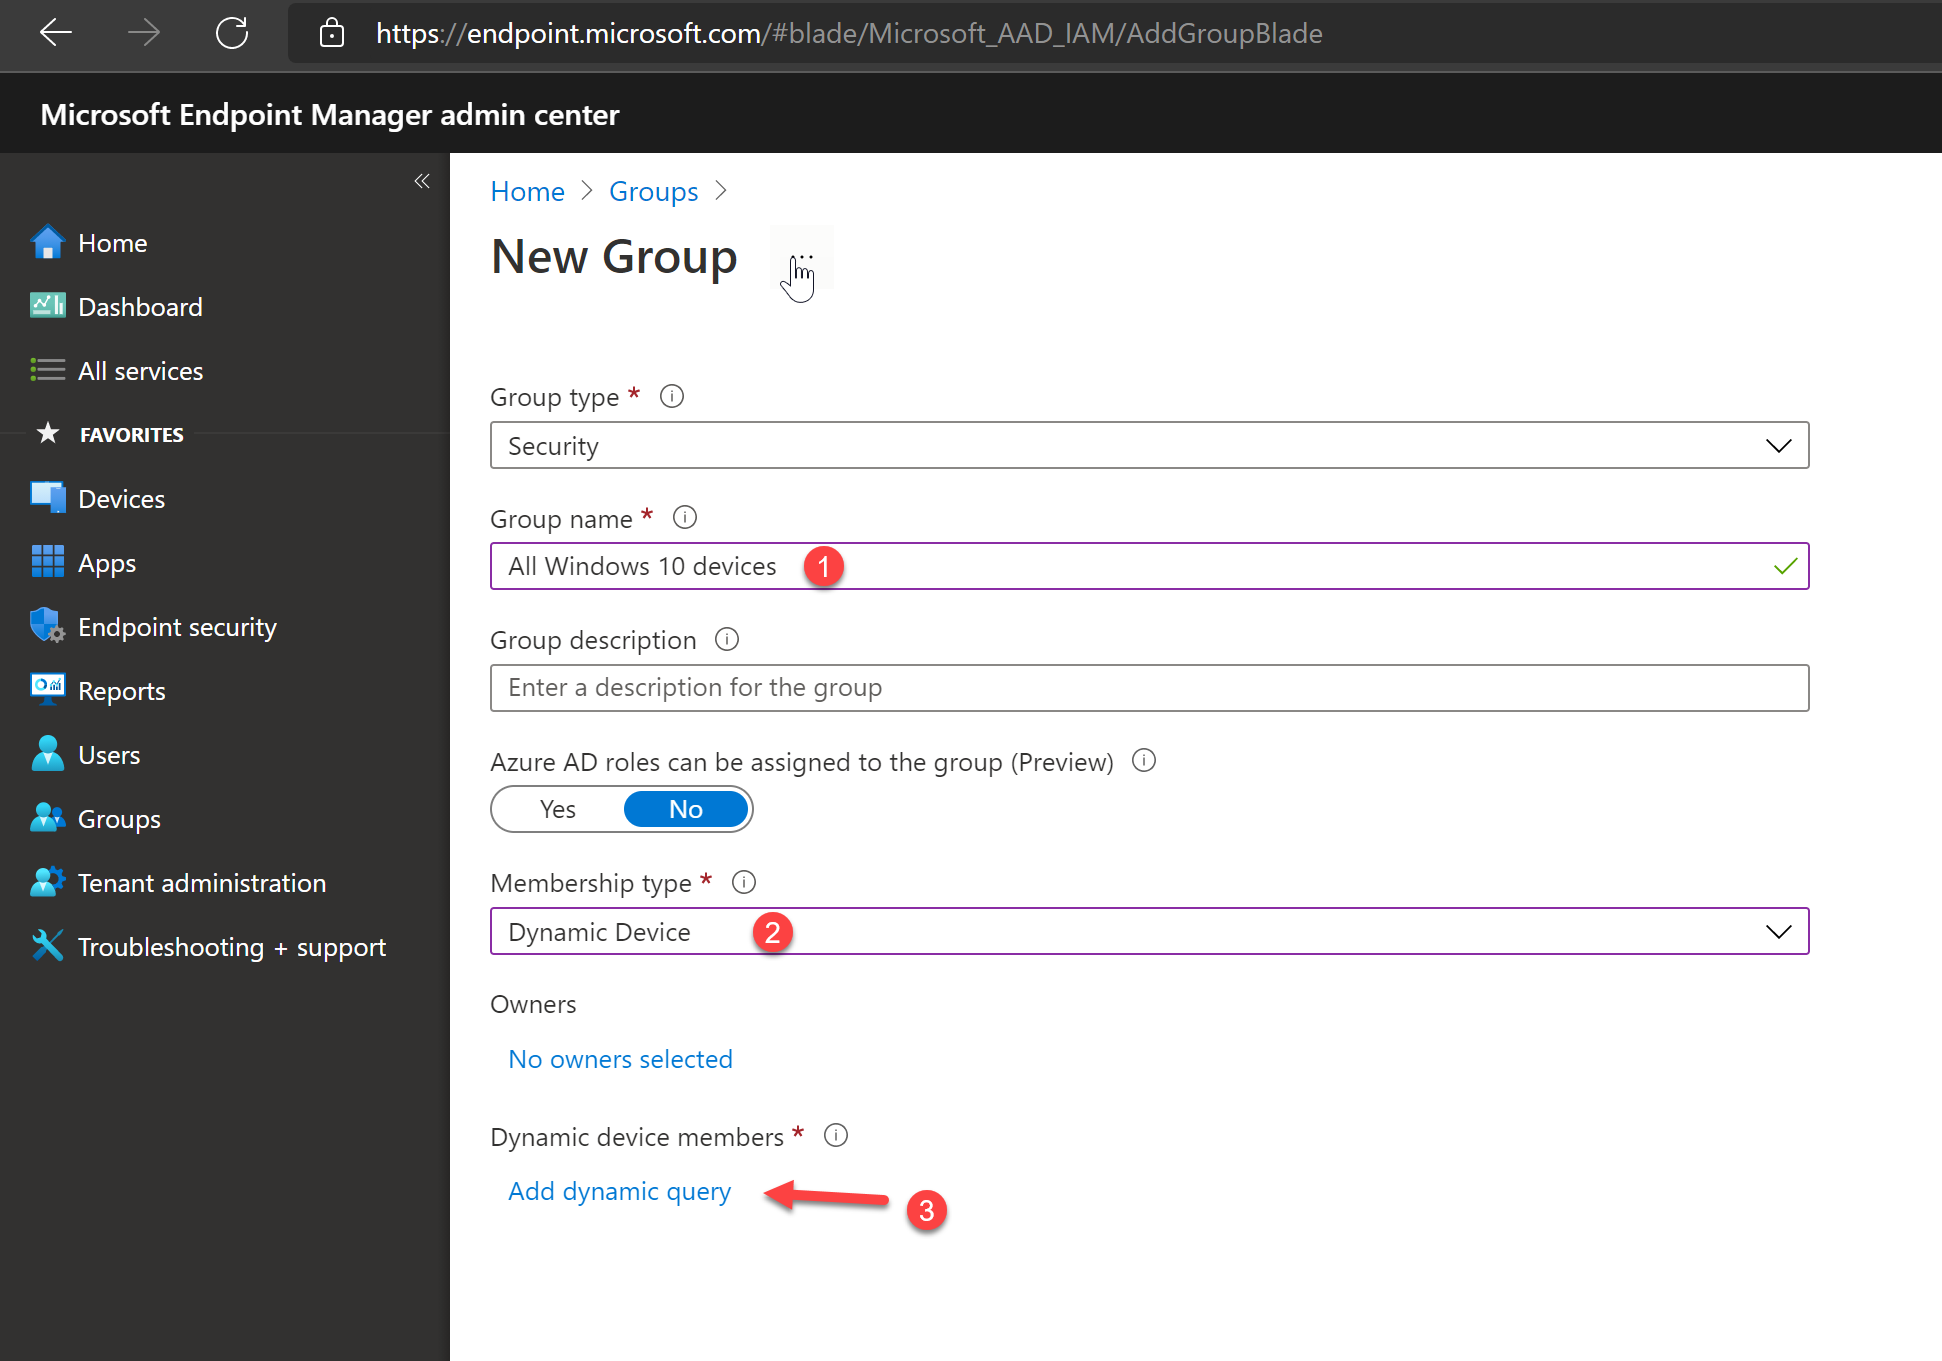
Type in a name for the group.
I used All Windows 10 devices.
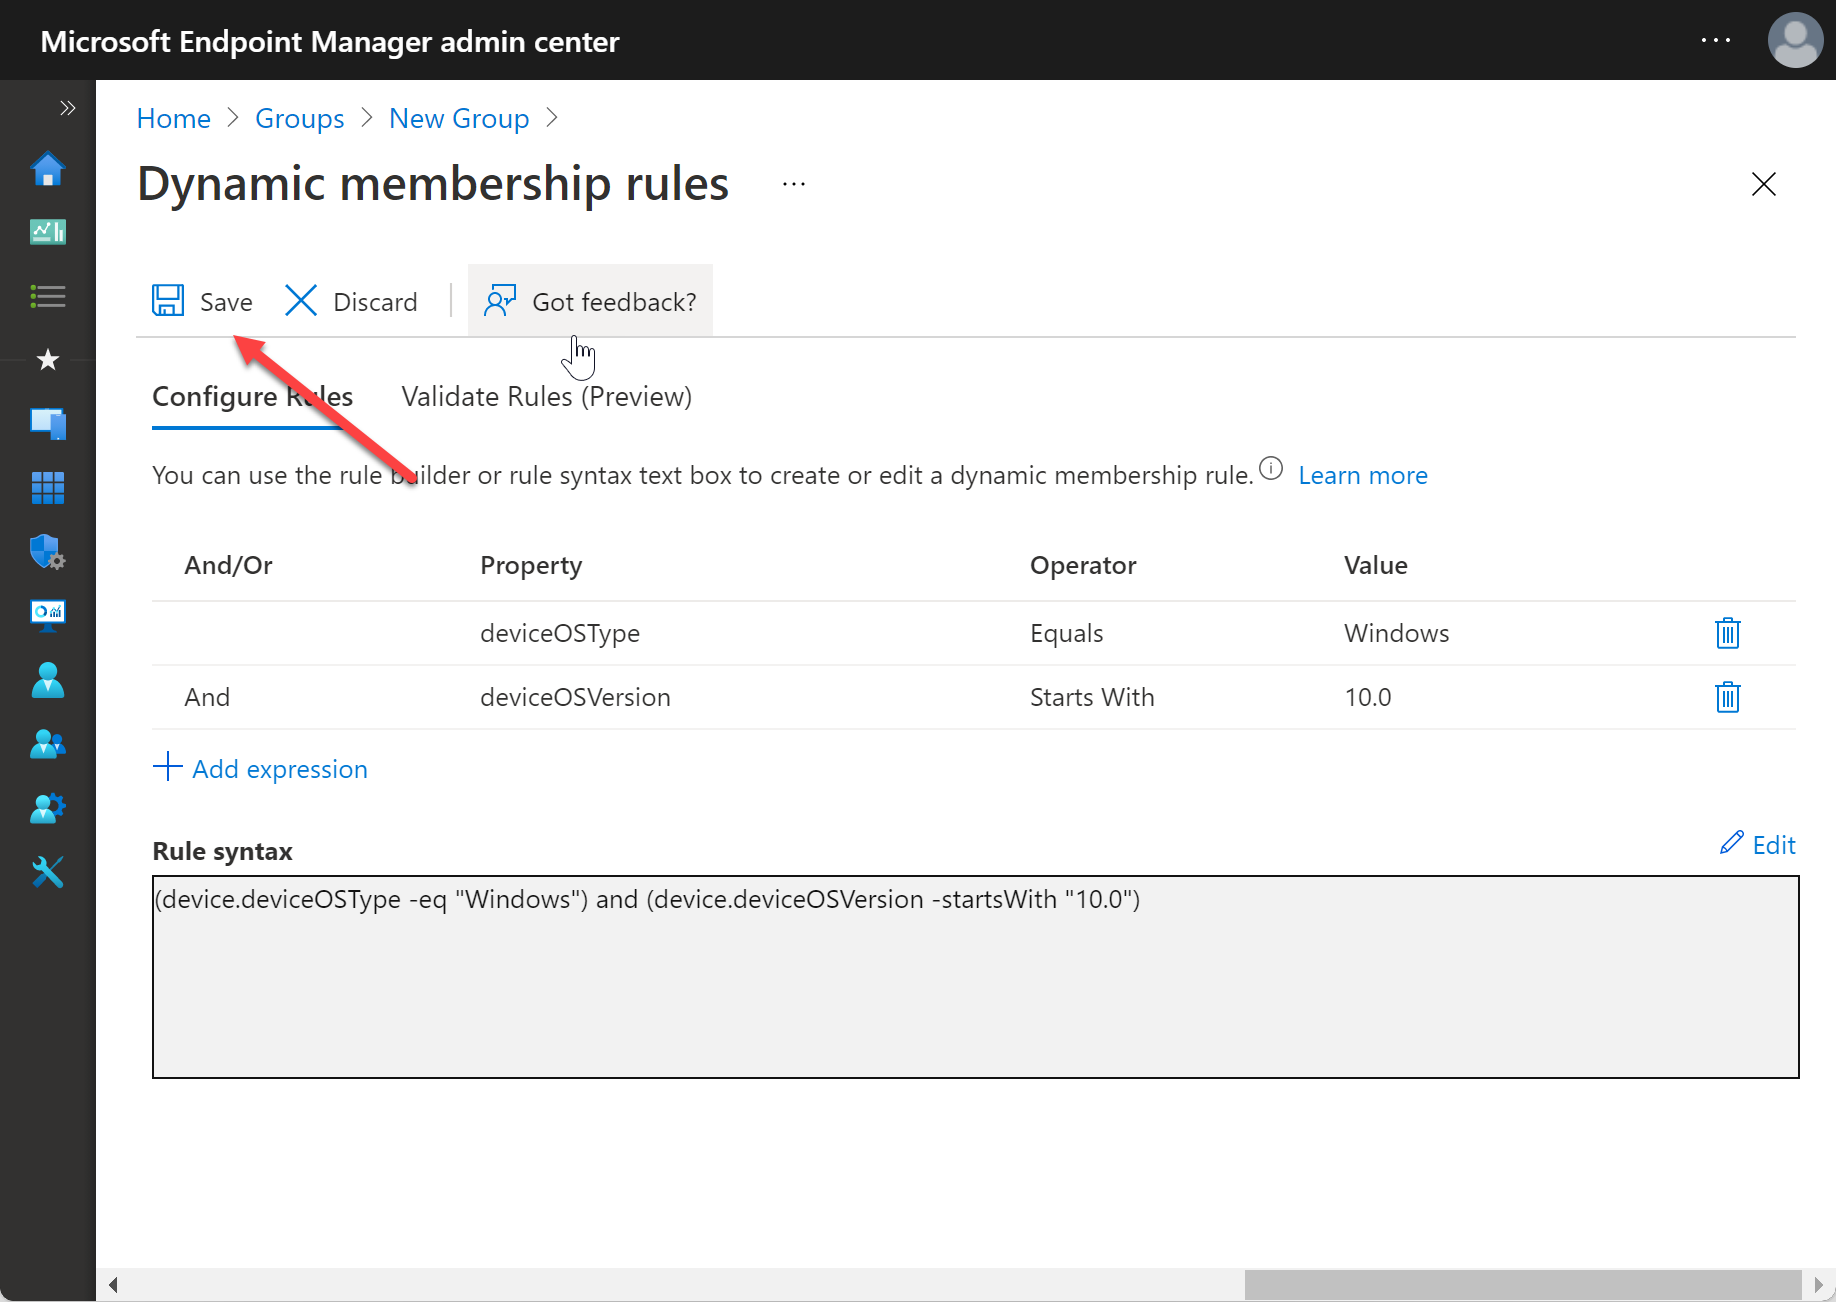
Select “Dynamic Device” in Membership type
Click “Add dynamic query”
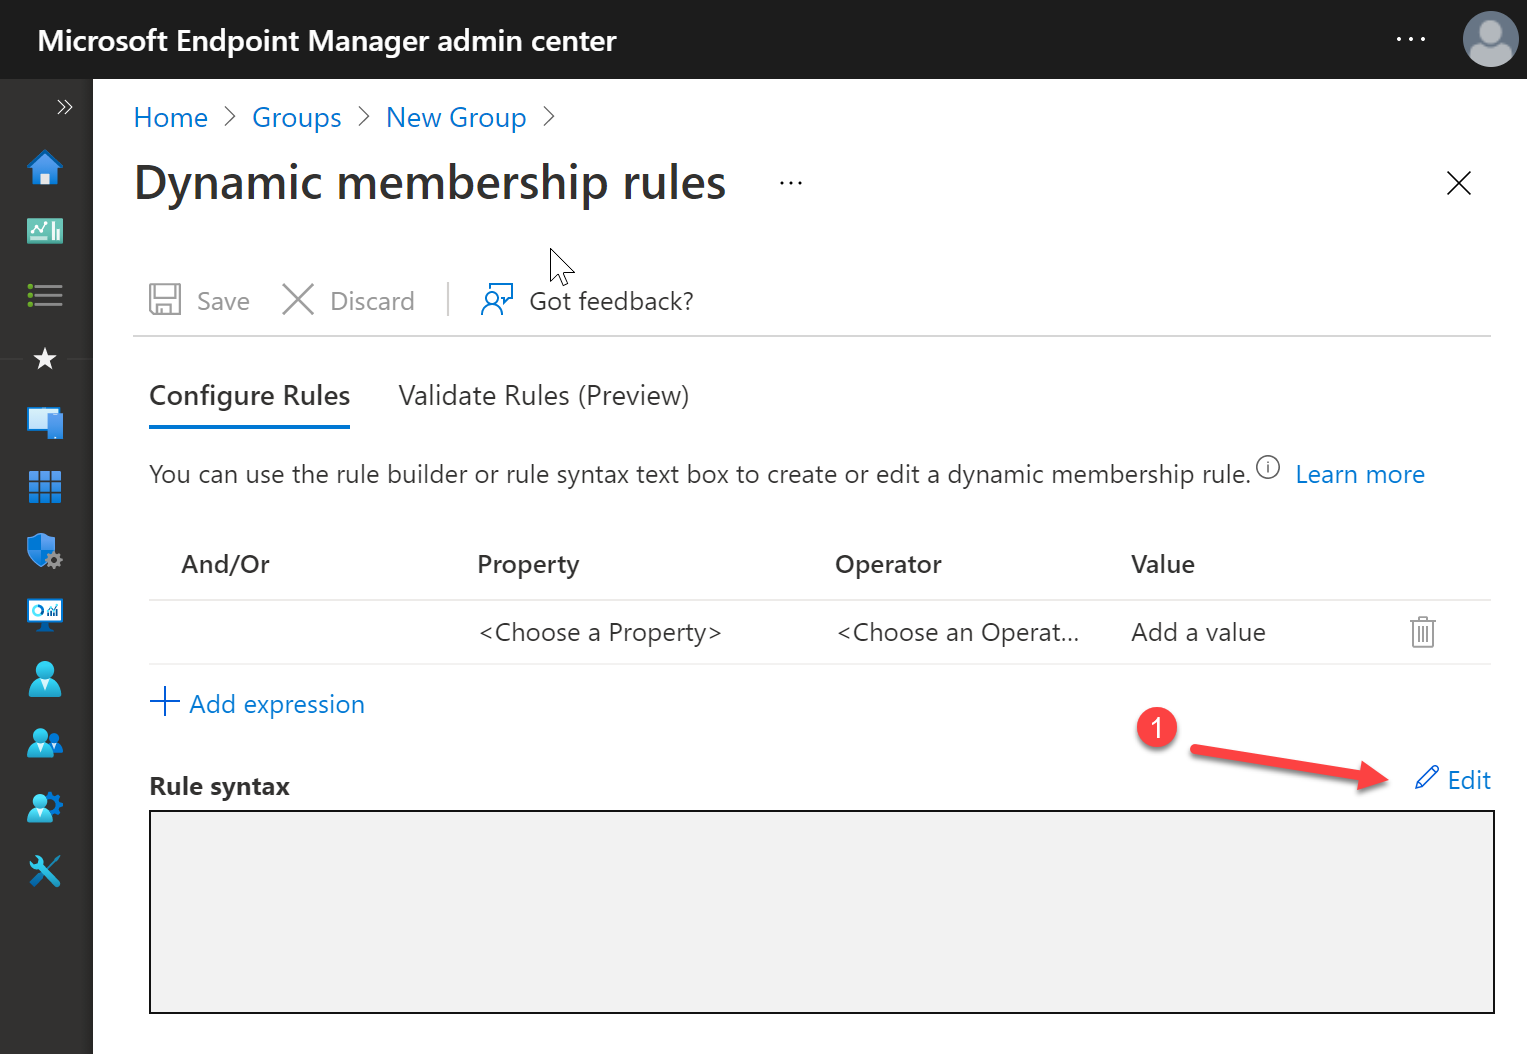
Click on “Edit”
(device.deviceOSType -eq "Windows") and (device.deviceOSVersion -startsWith "10.0")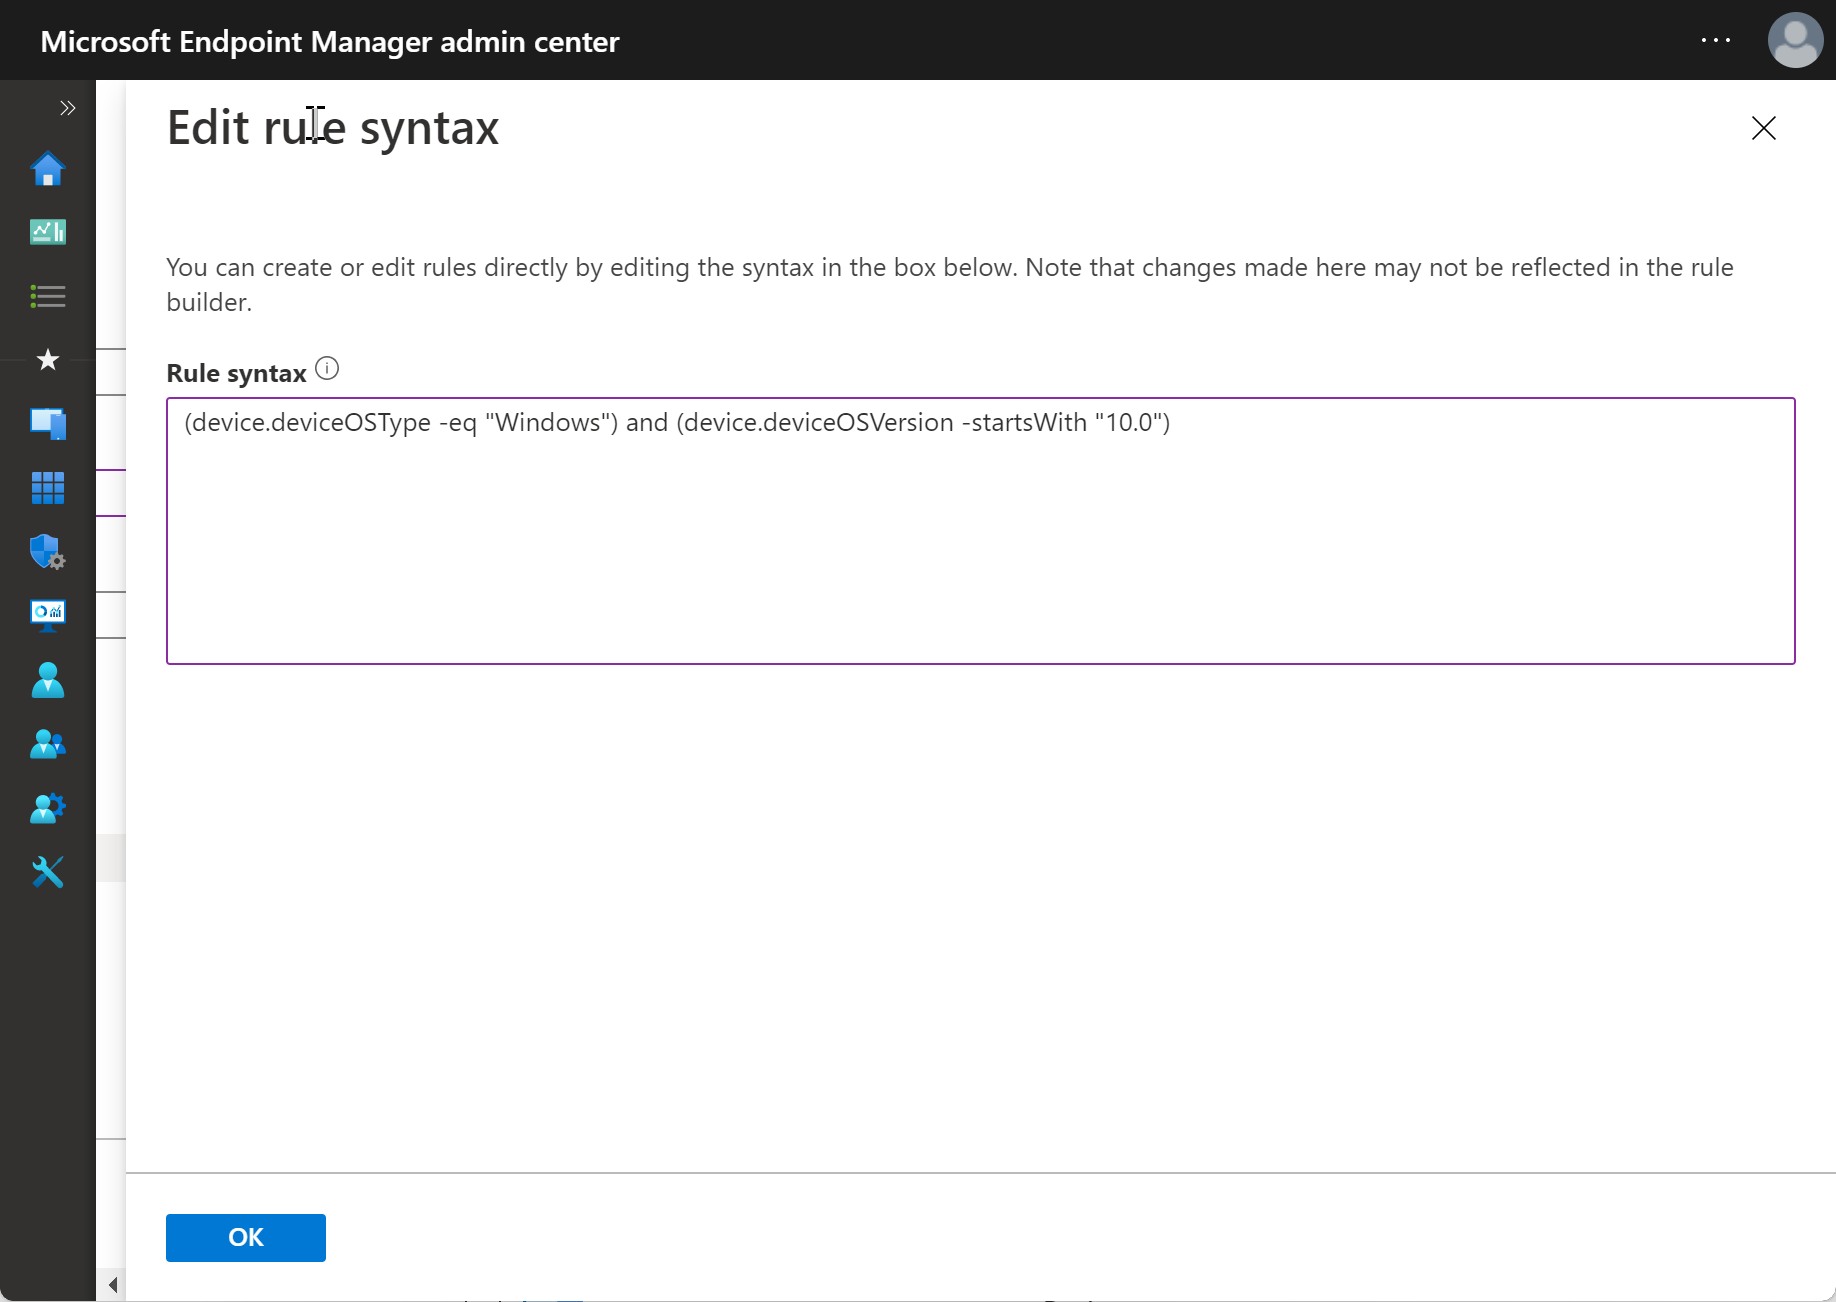
Click save:
Create Expedite Update in Intune
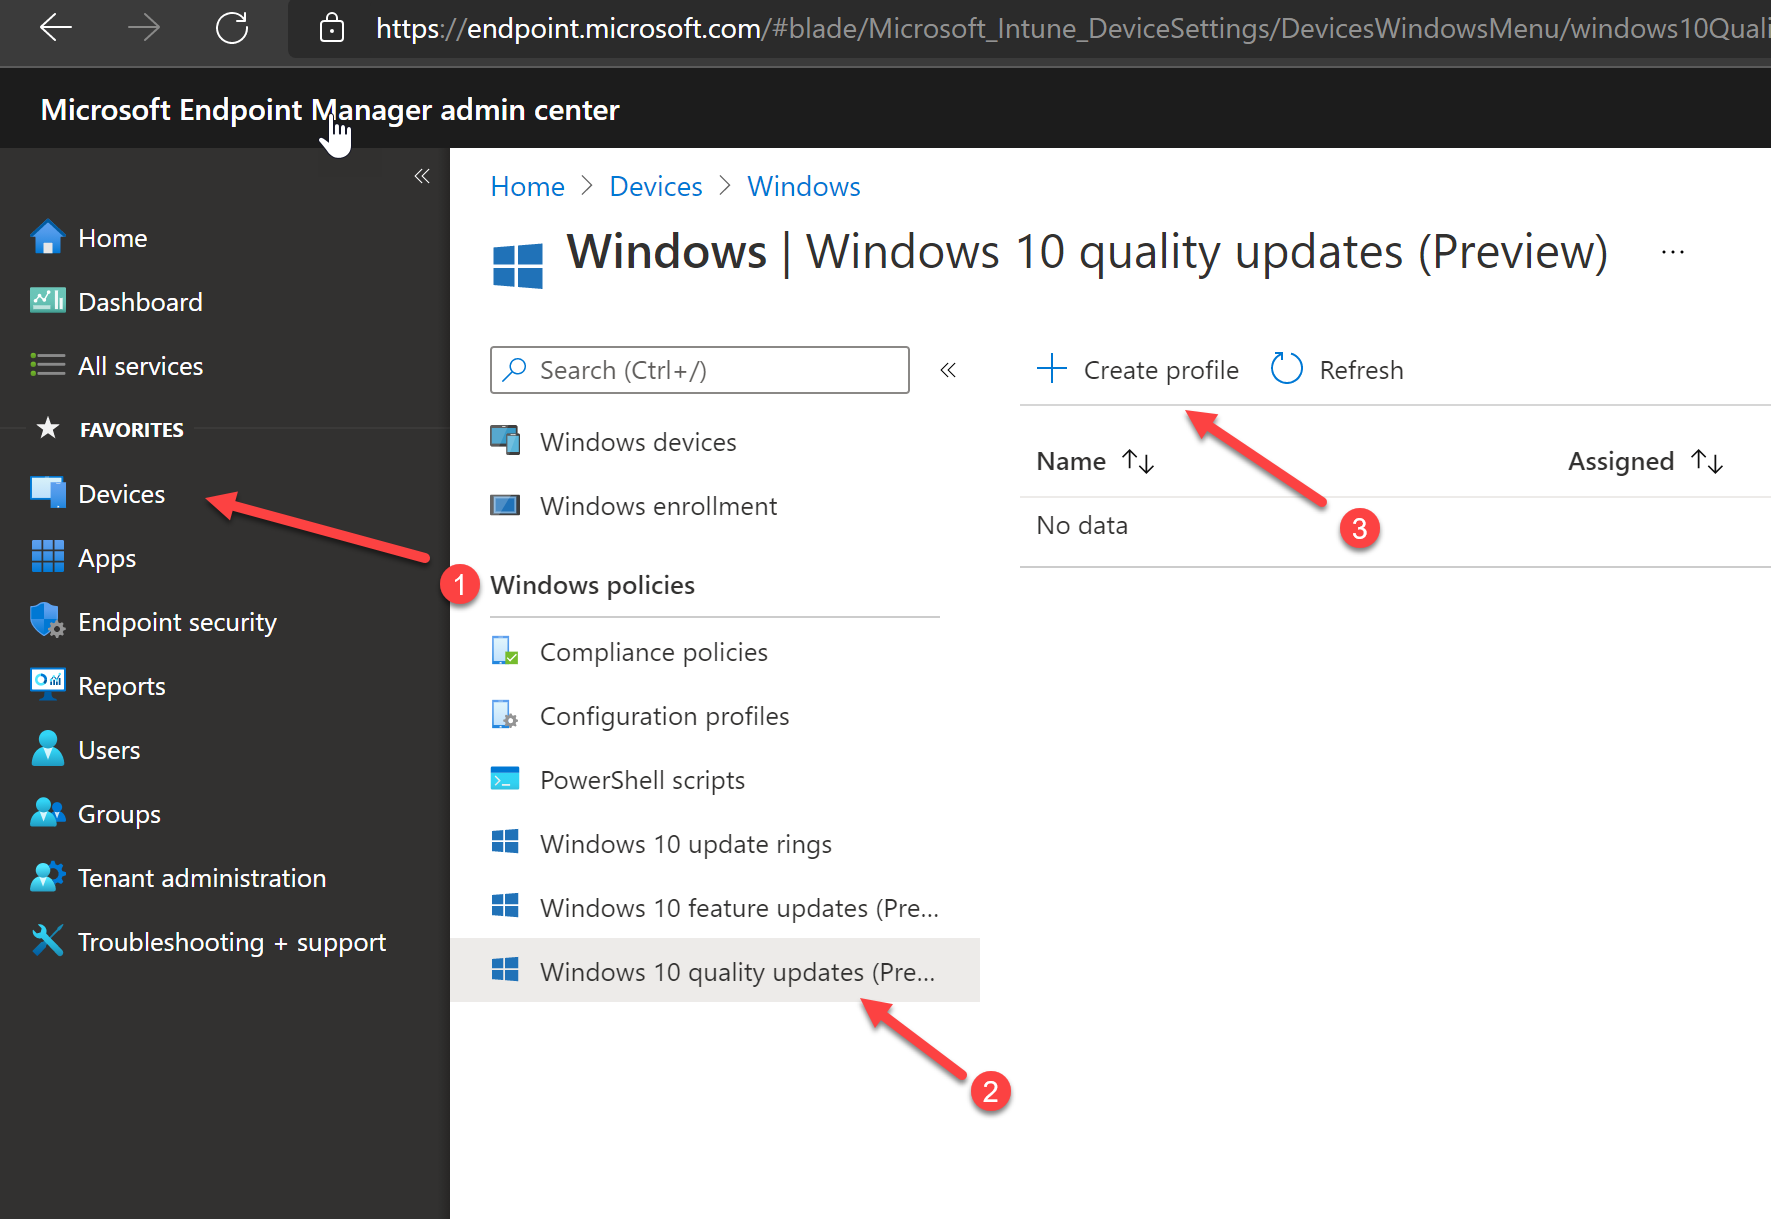
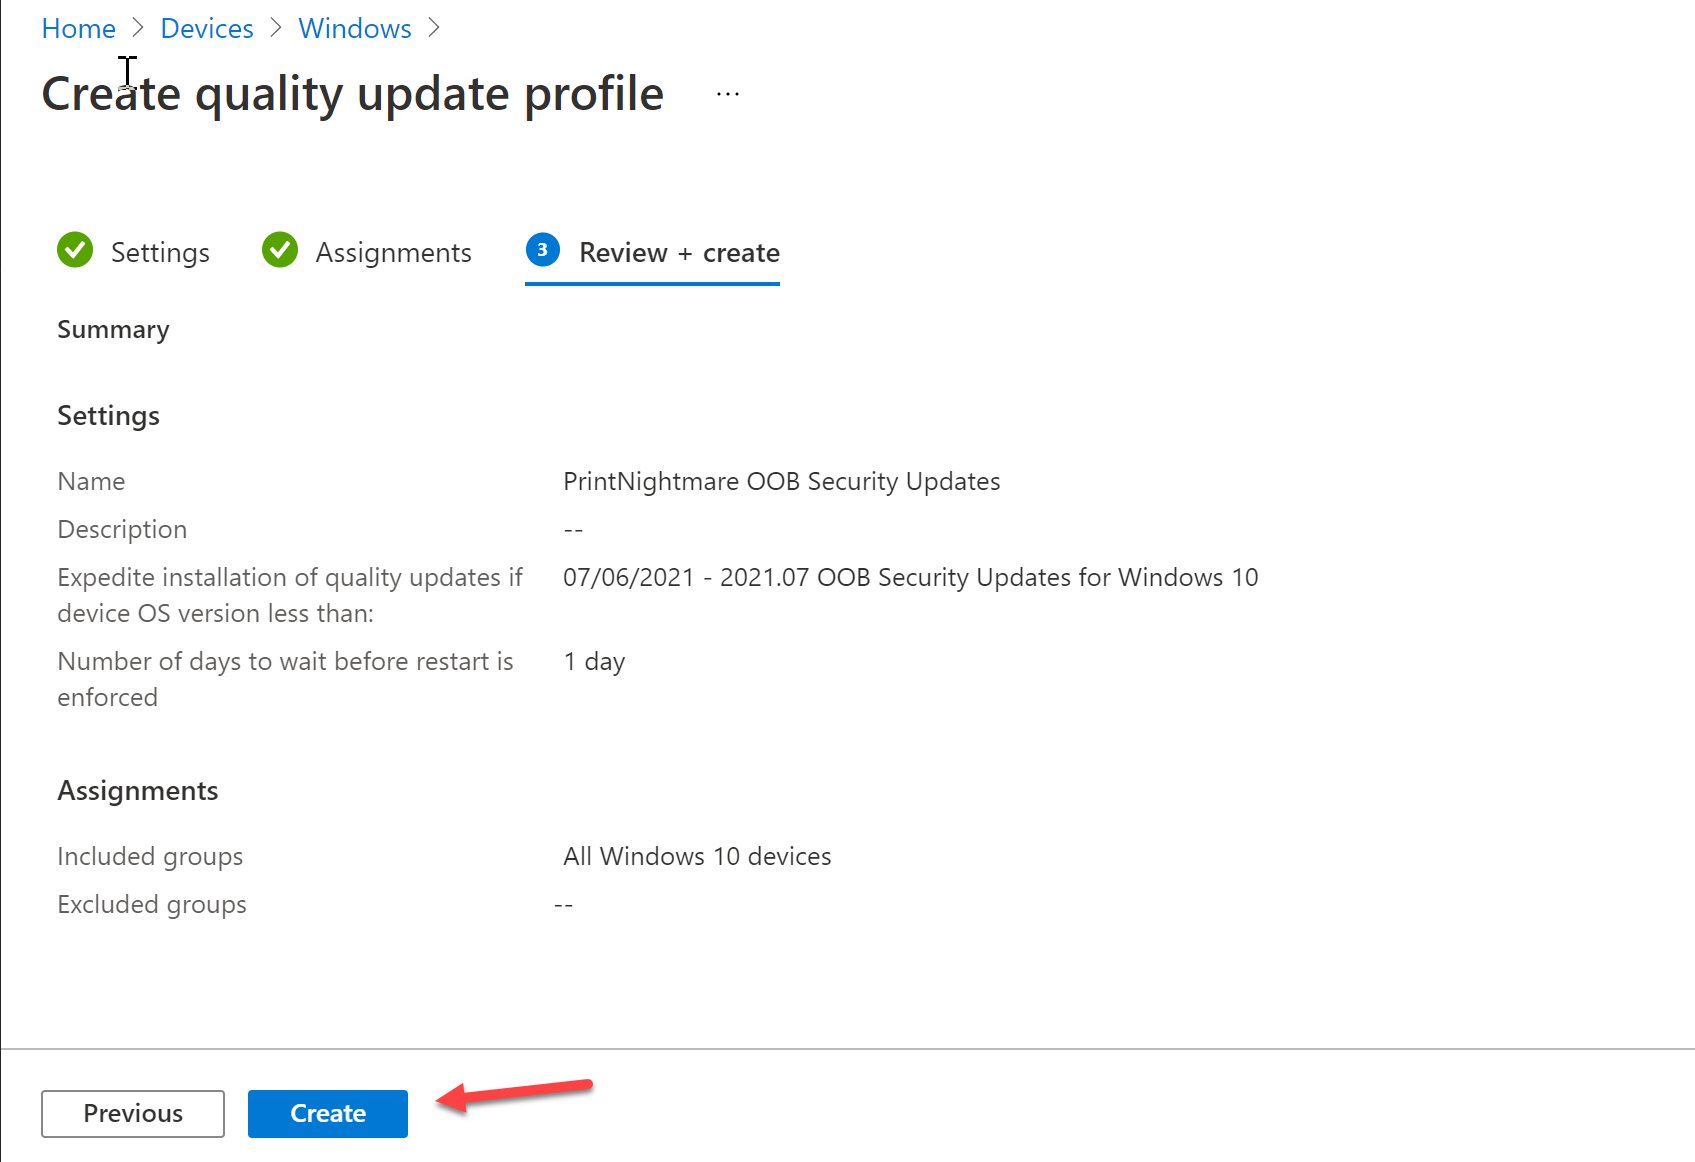
Go to Microsoft Endpoint Manager portal https://endpoint.microsoft.com and go Devices, Windows 10 Quality Updates and Click Create profile.
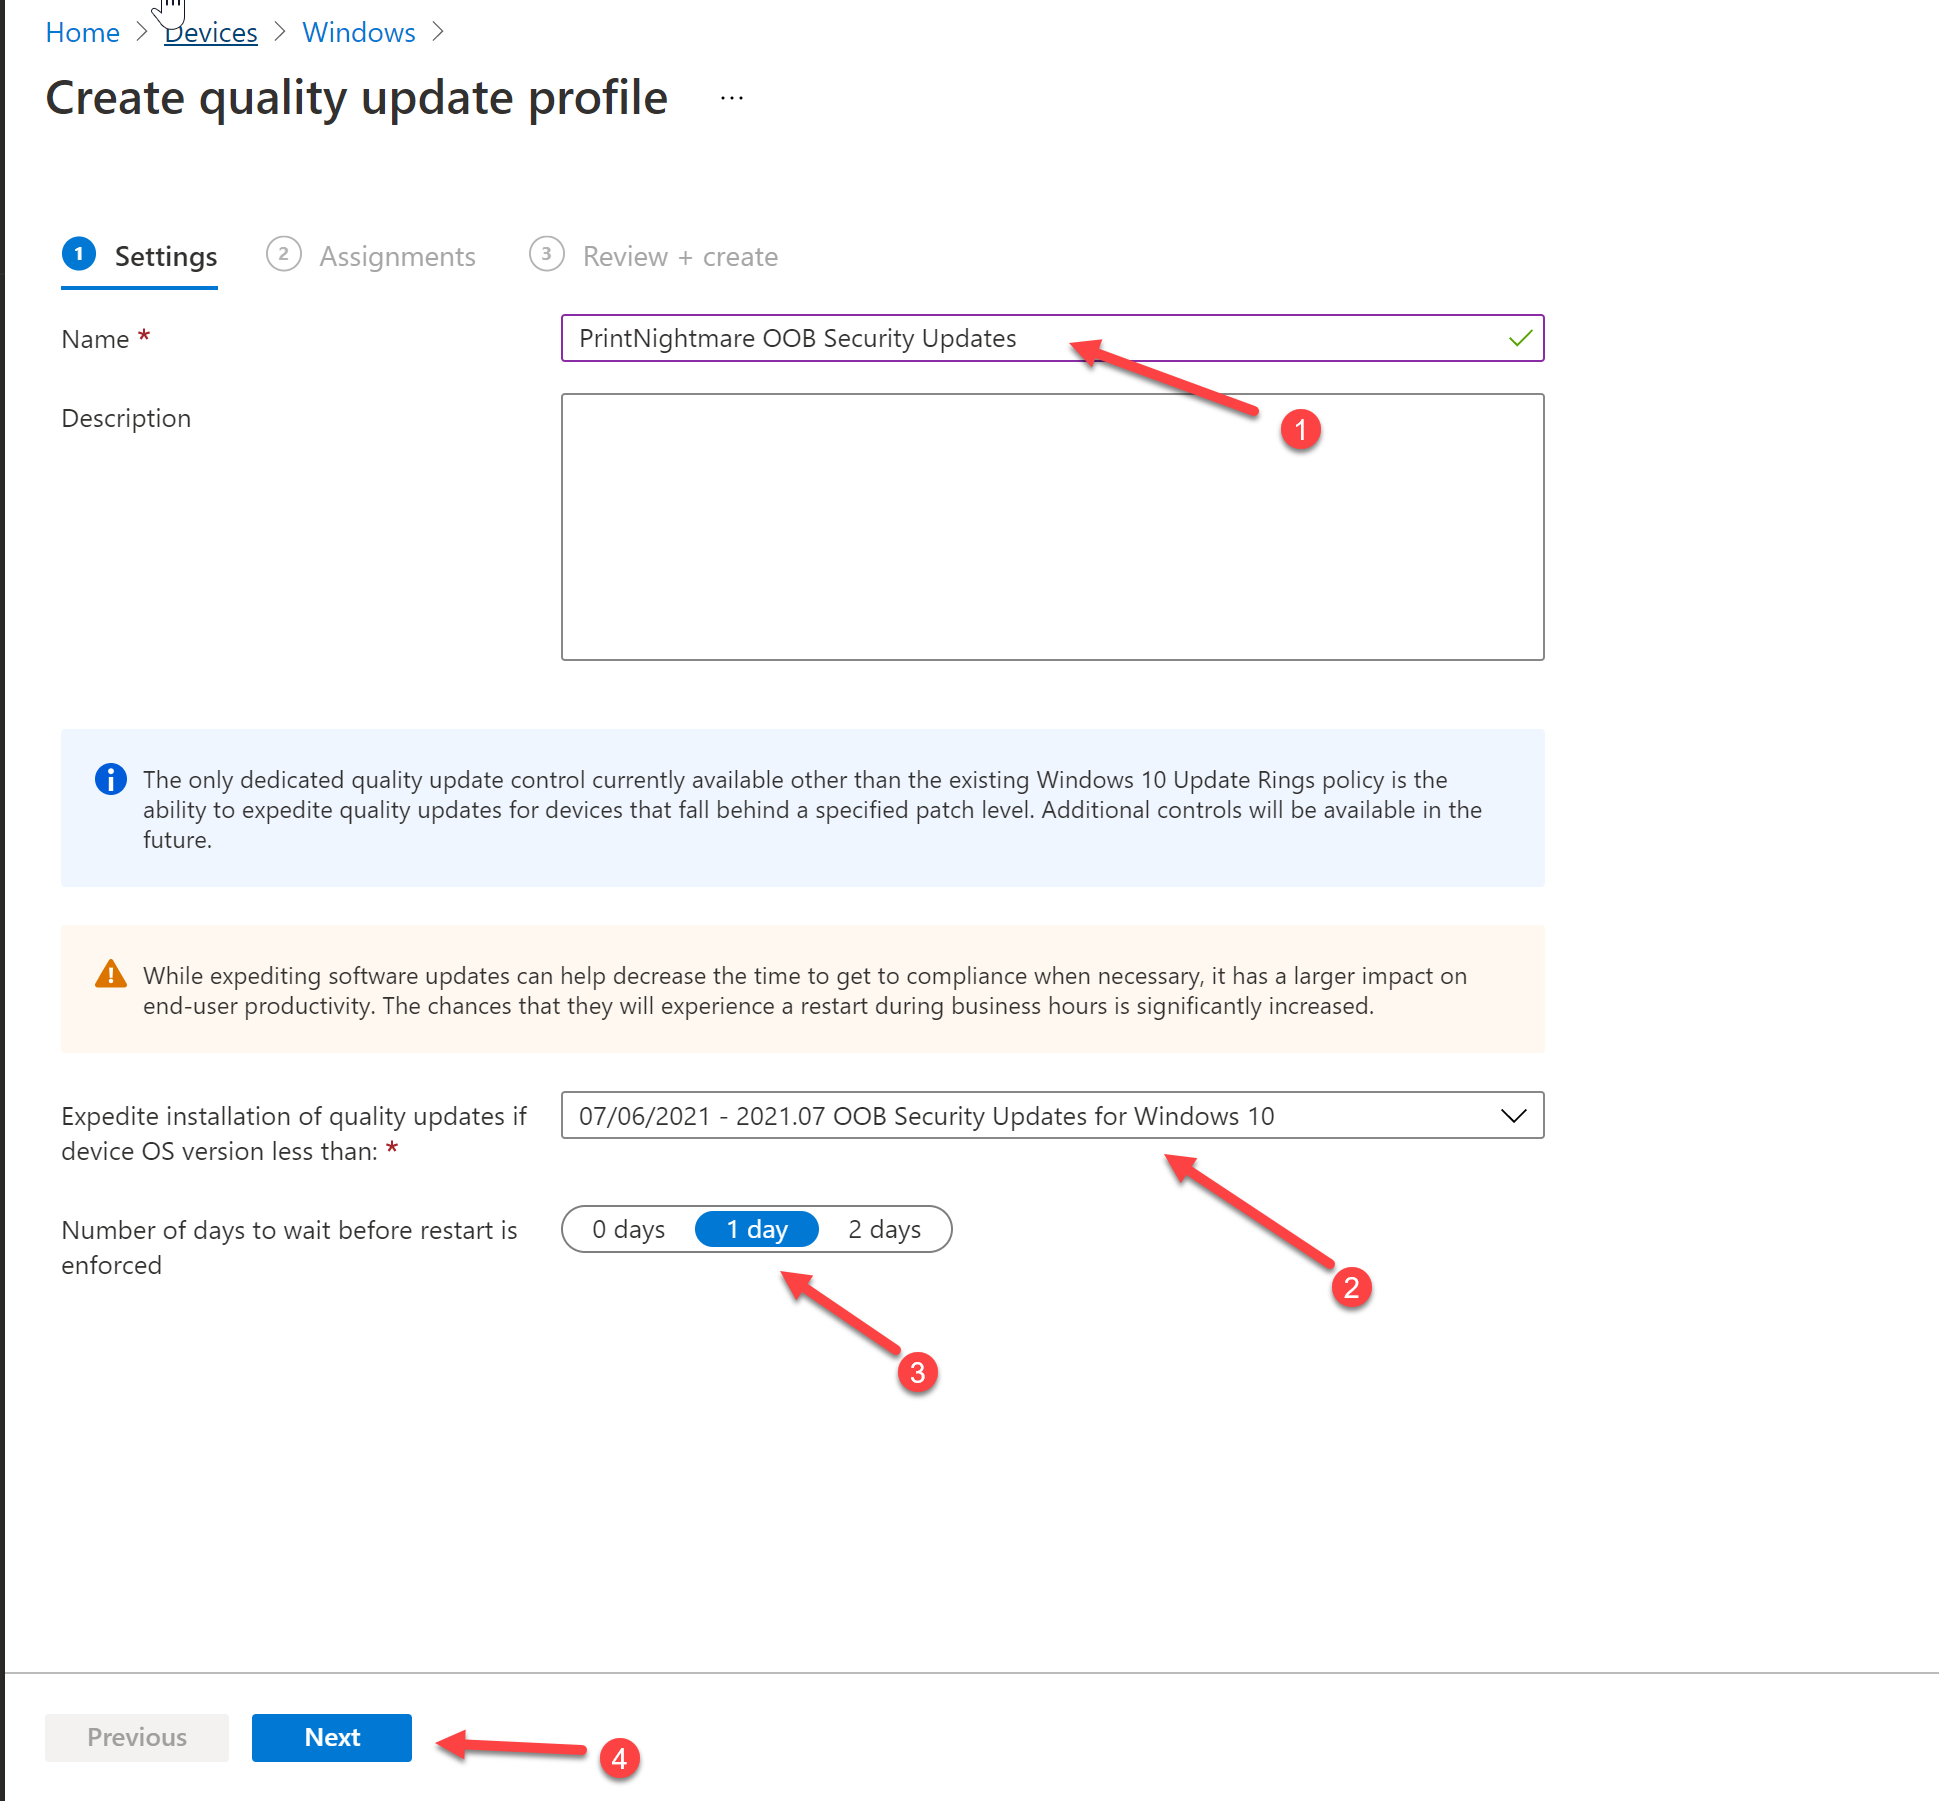
Give it an appropriate name.
Make sure 07/06/2021 – 2021.07 OOB Security Updates for Windows 10 is selected.
Select the amount of days the end user can choose when they want to restart. When this period is done, the device will force a restart.
Click Next.
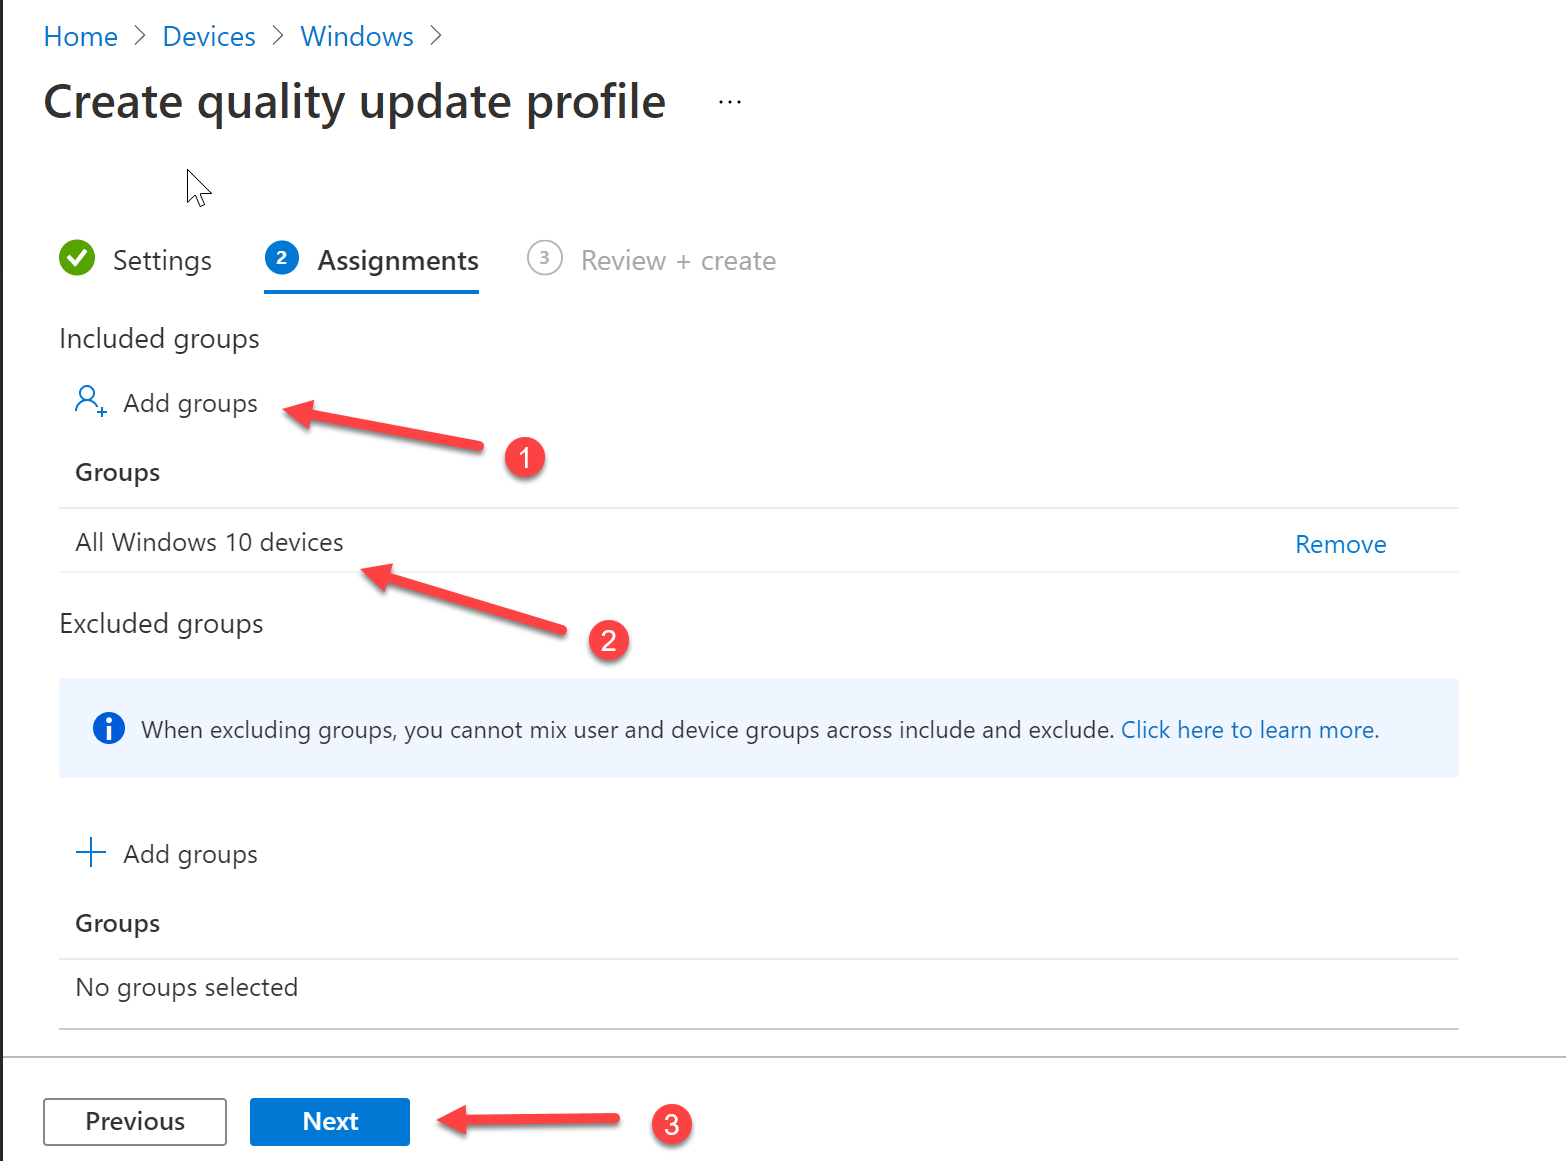
Assign the group we created earlier byt click “Add groups” and search for the group.
I use “All Windows 10 devices”.
Click Next.
Click Create.
Monitoring the update rollout
There is a little built in monitoring for Expedites updates in Intune.
It can be viewed in the Reports Pane.
Go to https://endpoint.microsoft.com, Reports and click Windows Updates.
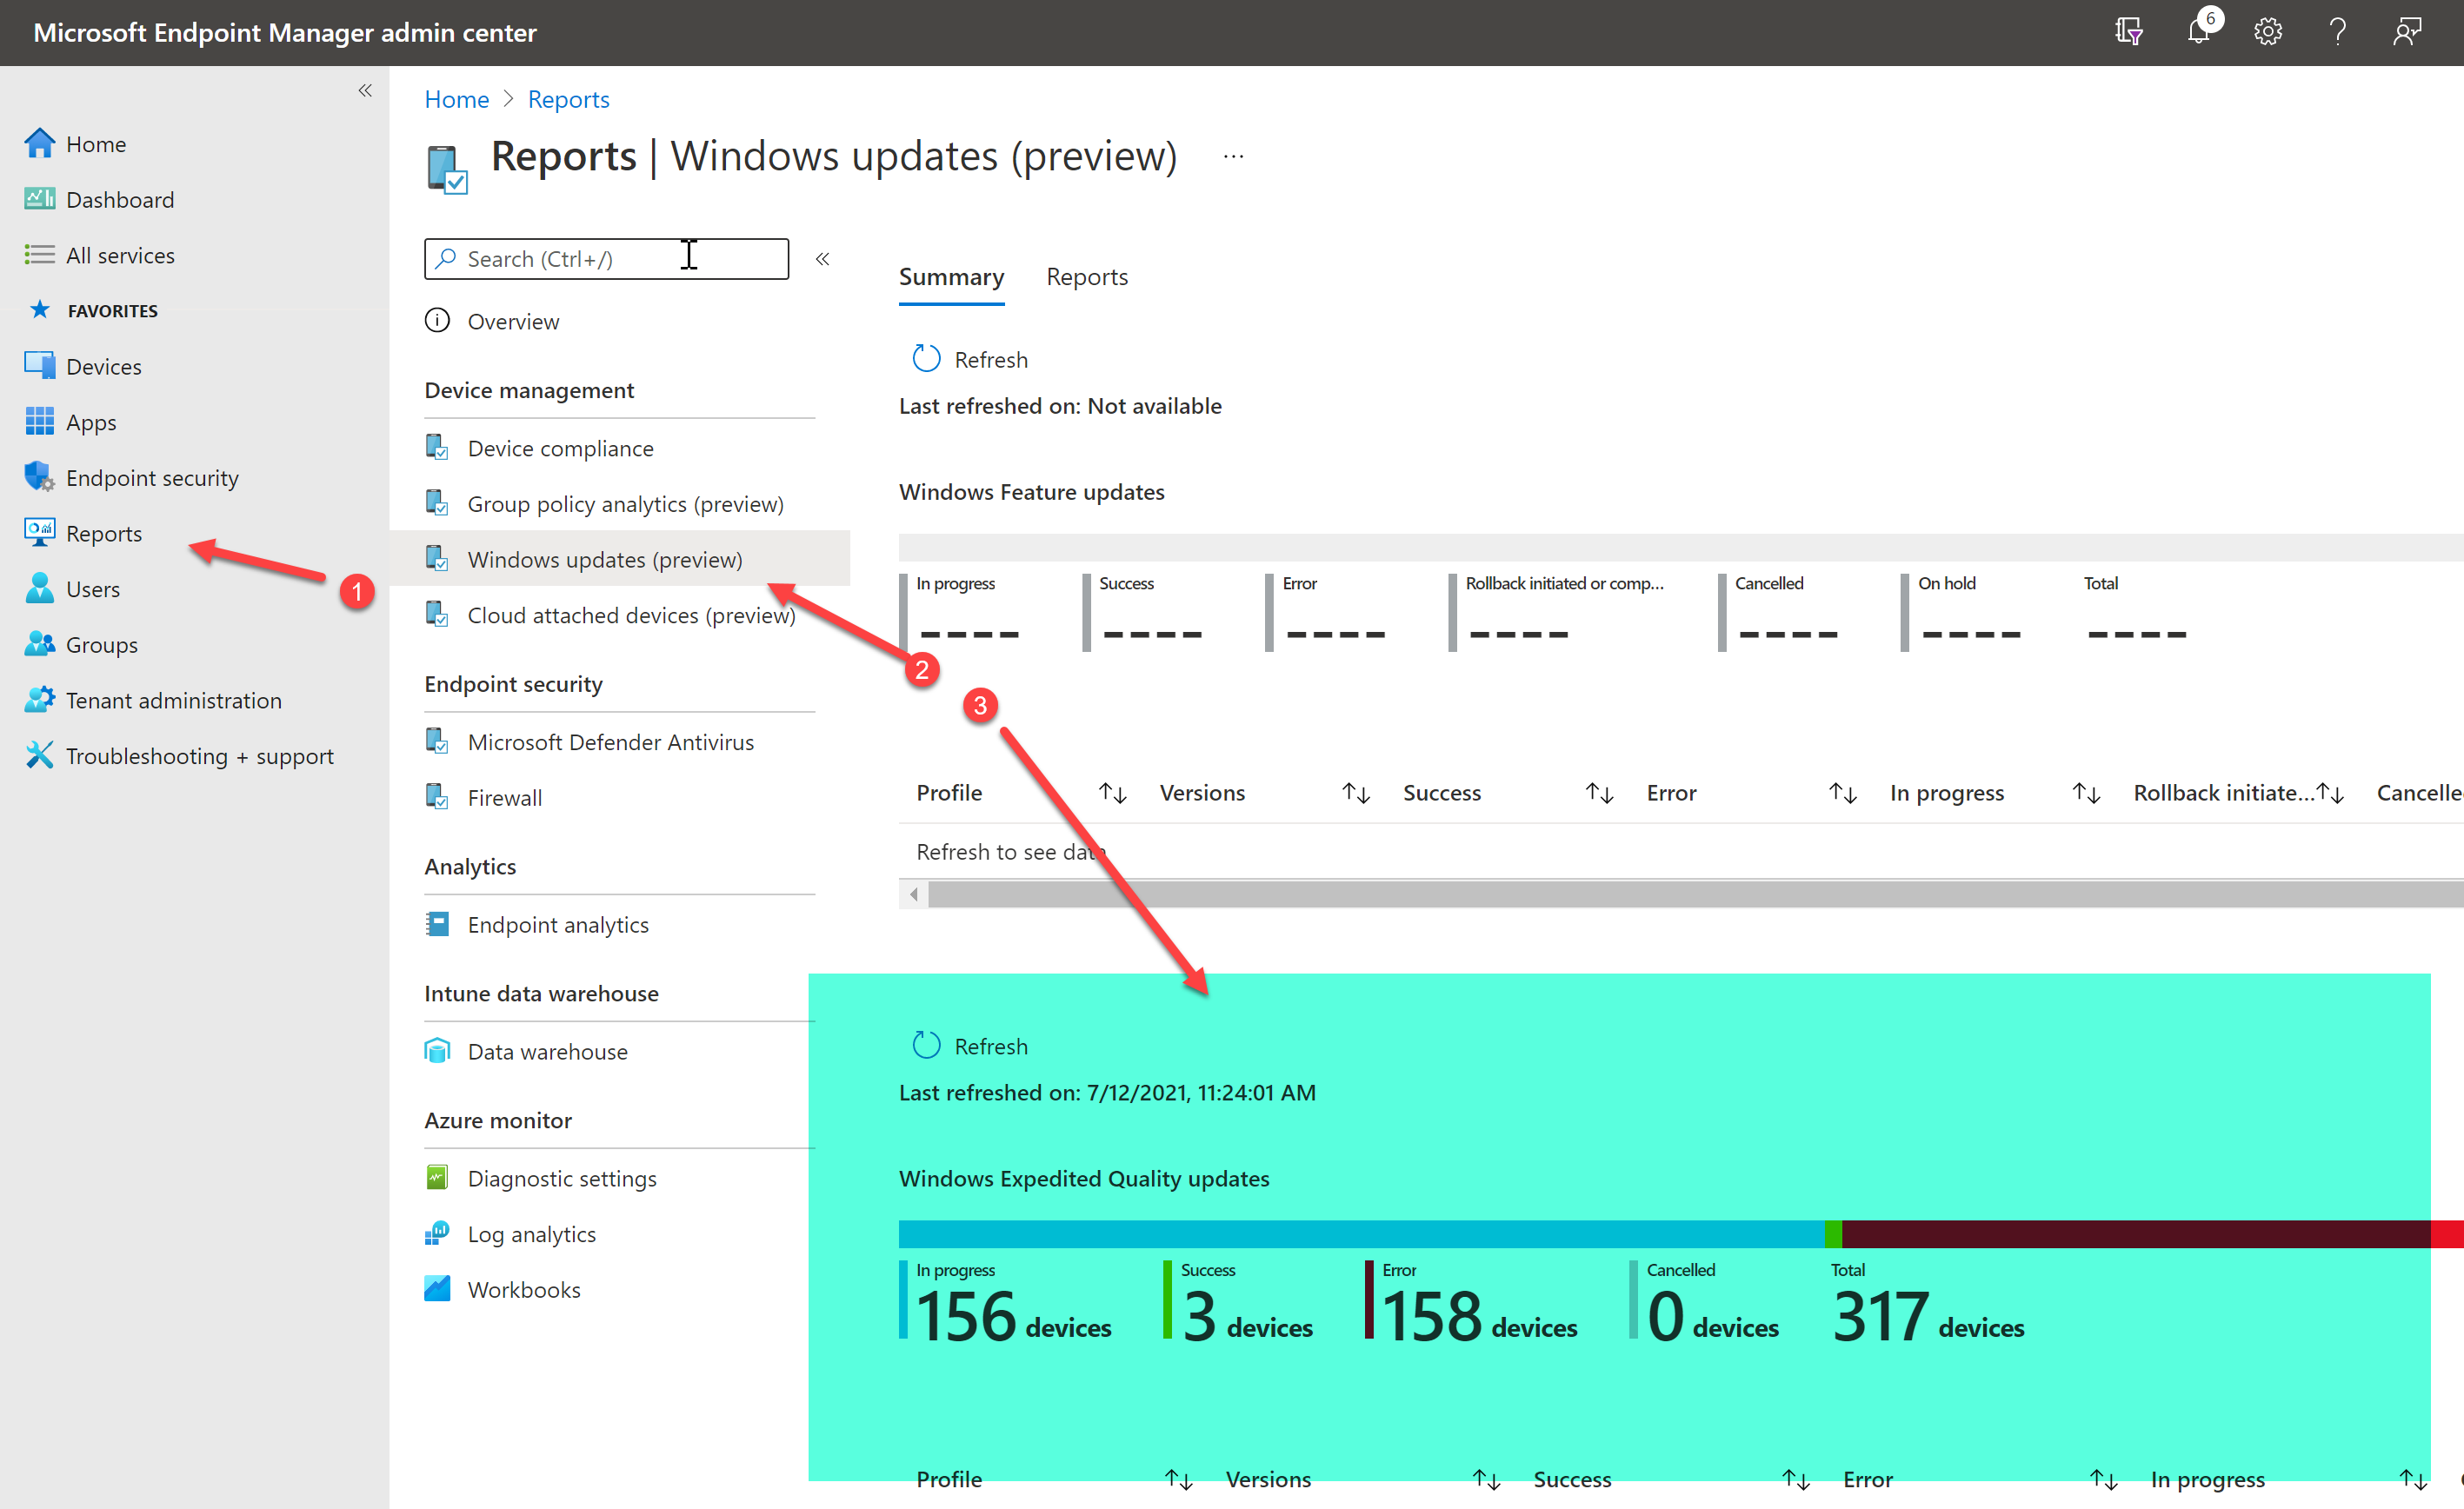
The above is just a screenshot from a demo environment and I can see I a lot of troubleshooting to do with that amount of errors.
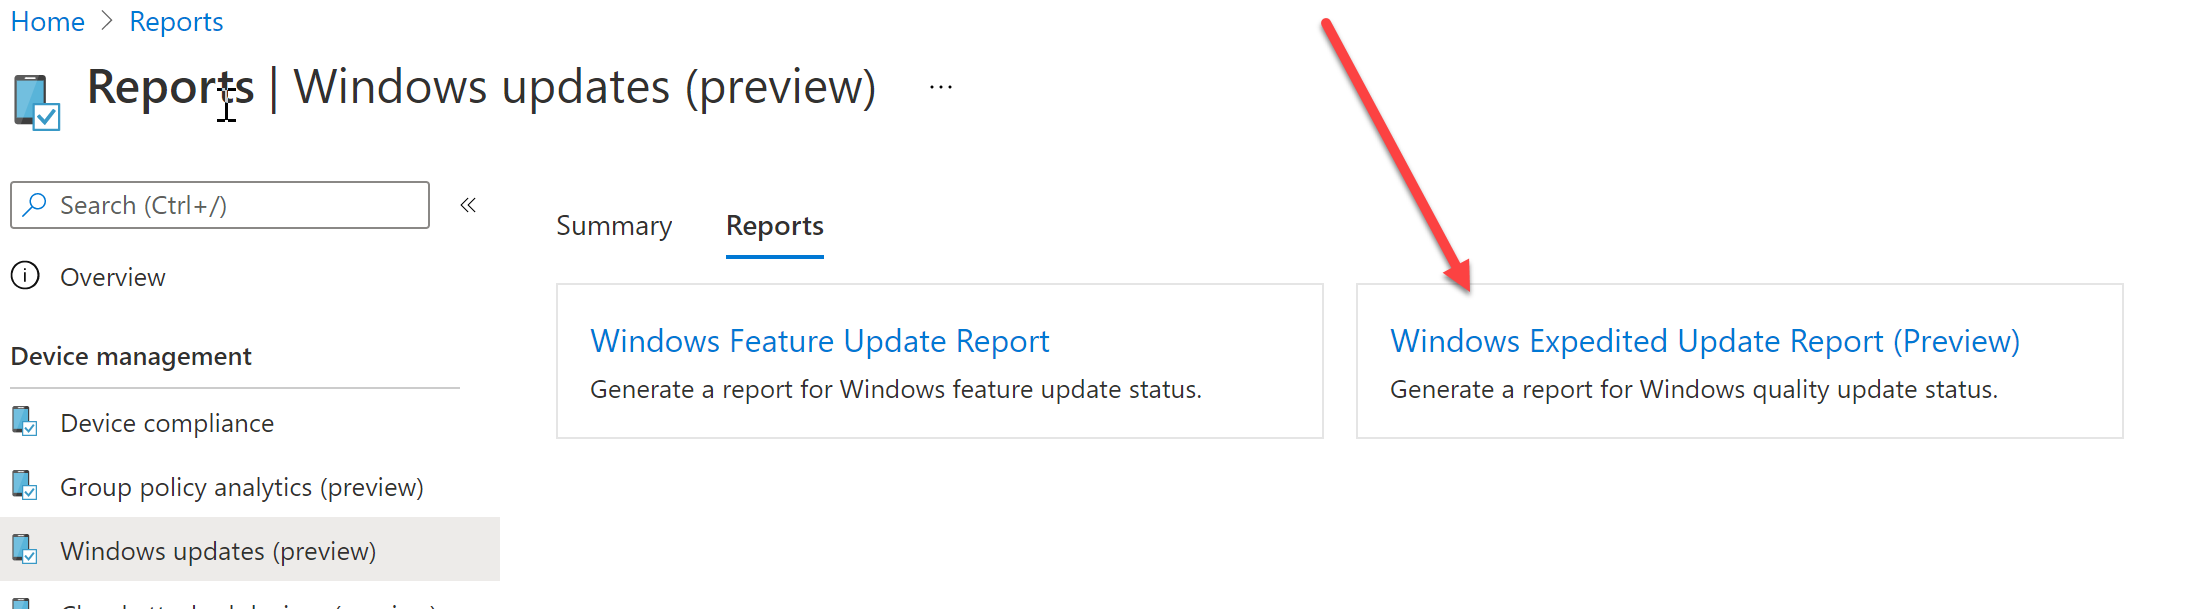
For a more detailed view, click on Reports in the top and select “Windows Expedited Update Report”
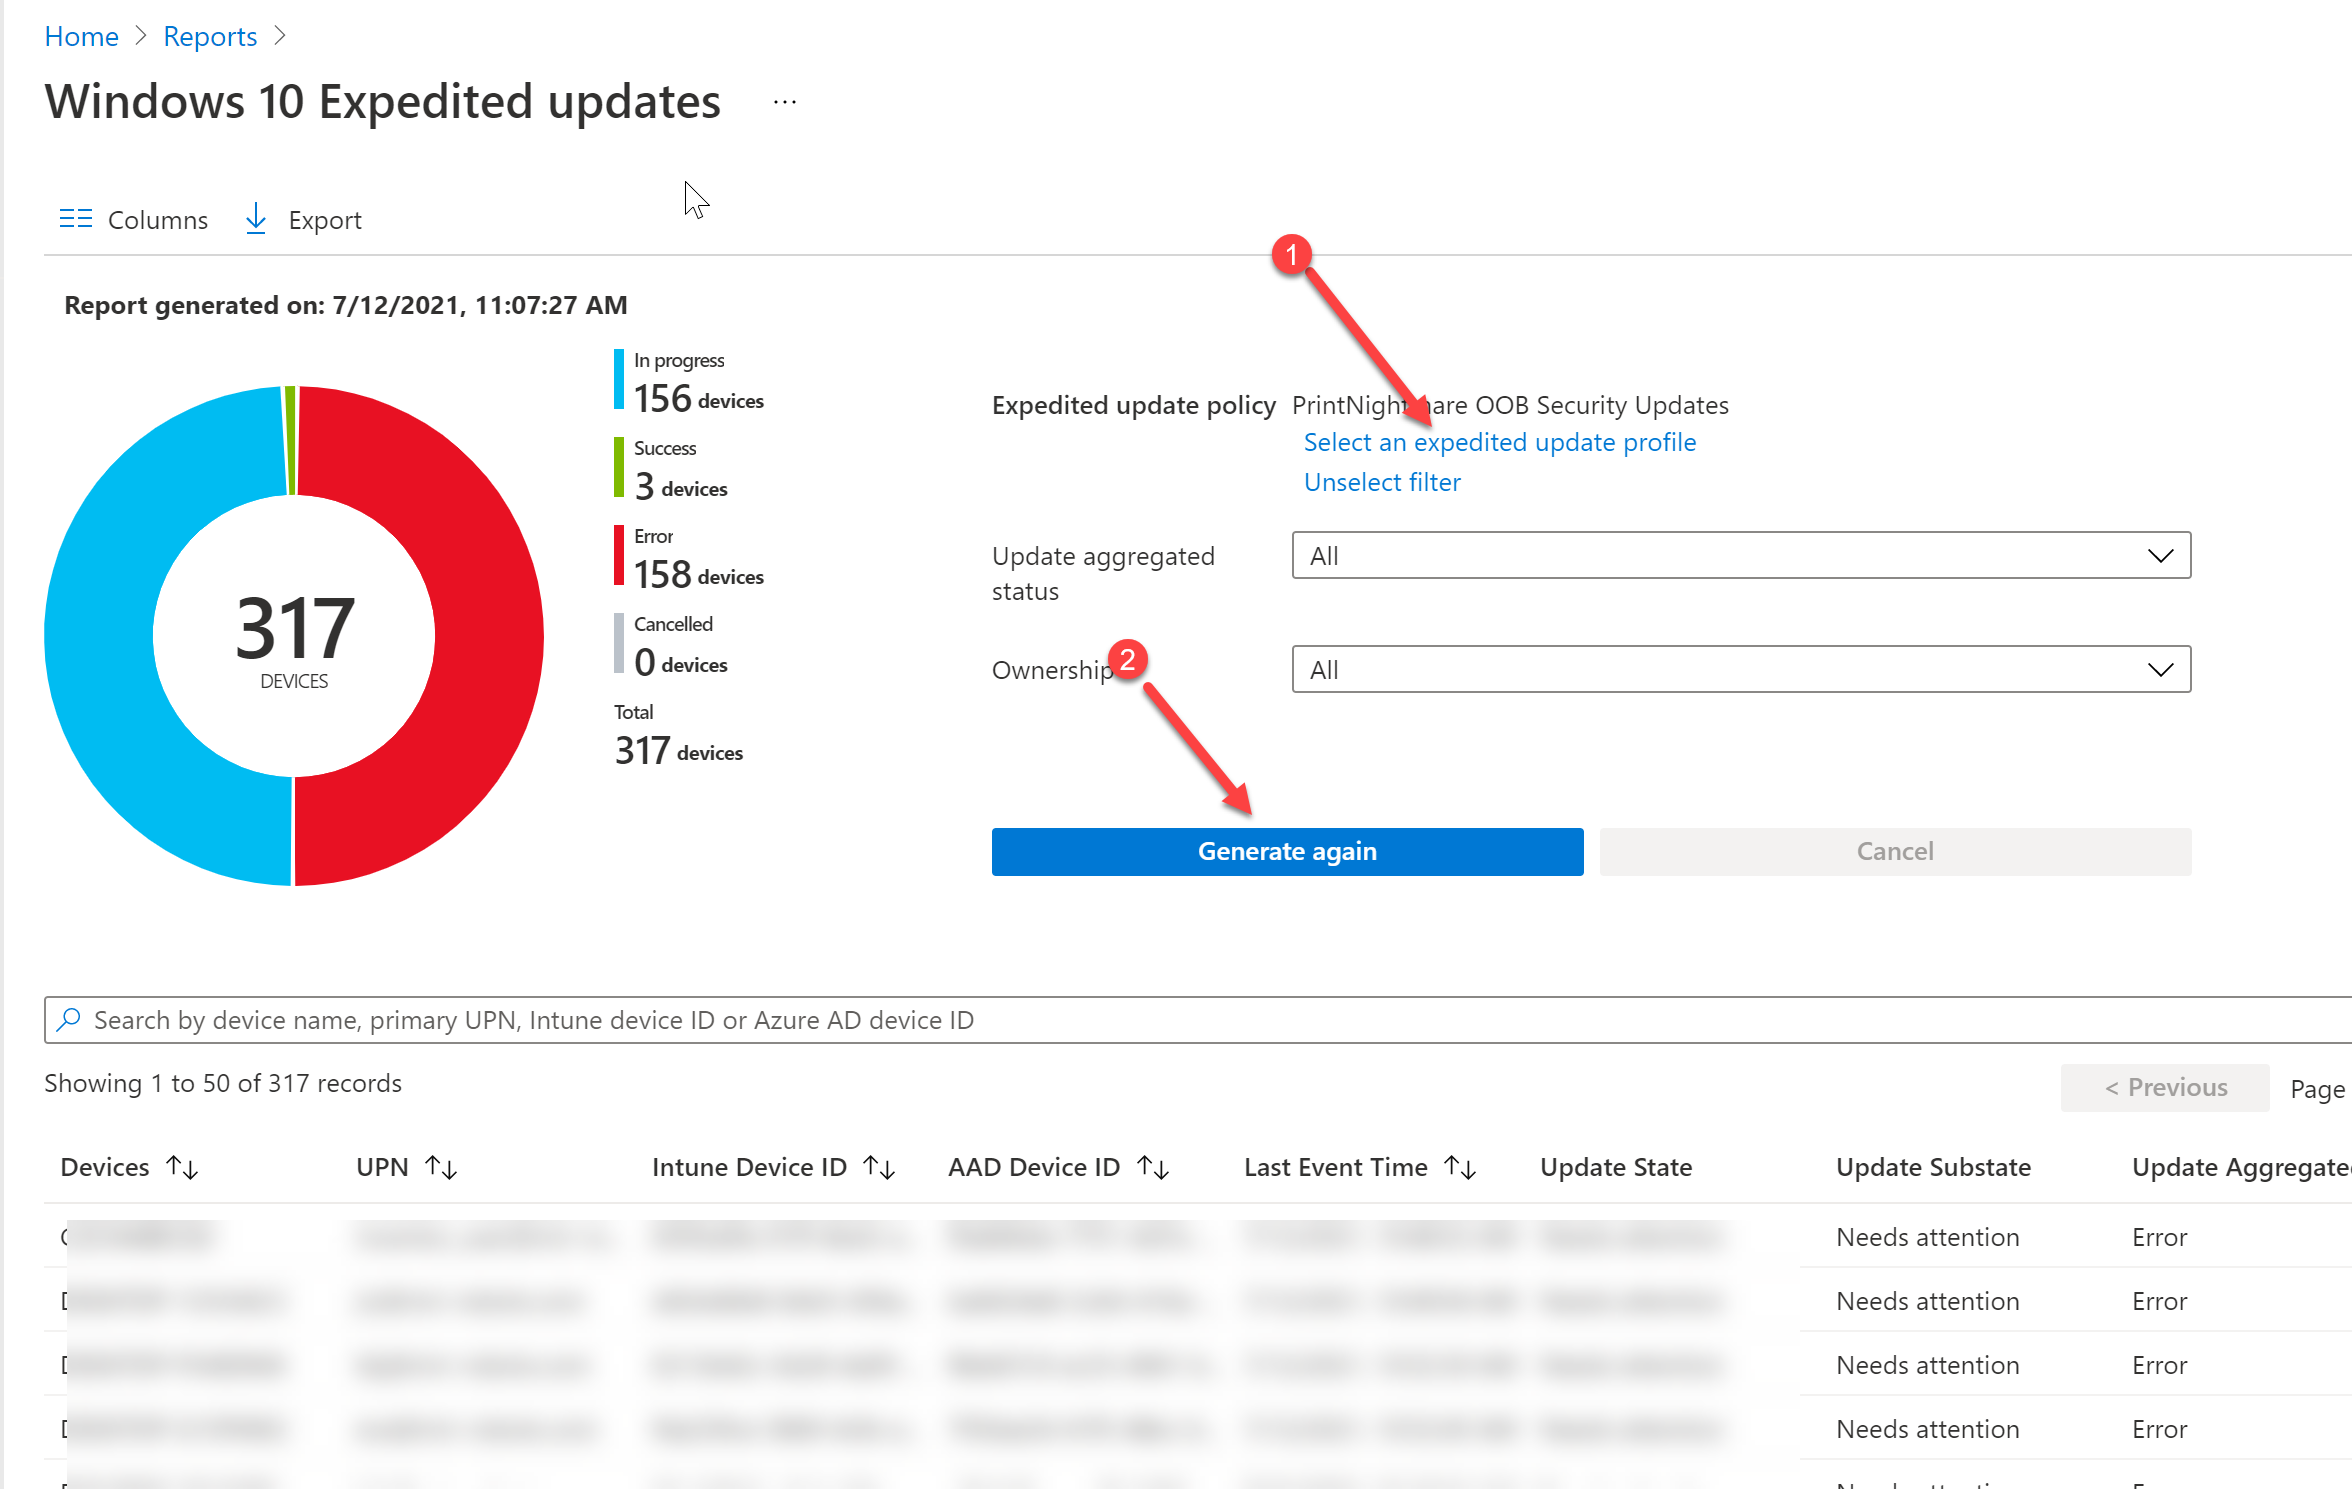
Here you need to select with expedited update you want a report for and then click Generate.
Below we can see computer names and
Maybe in a later block post I will dive deeper into troubleshooting errors, but for now that is it.
